If you’re reading this, chances are you’re new to the world of transformer maintenance, or you’ve just unboxed a transformer winding resistance tester from our warehouse and have no clue where to start. I’ve been in this game for seven years—first as a field tech helping small utilities troubleshoot faulty transformers, then as part of the team building and testing these very testers before they ship out. I’ve seen beginners make every mistake imaginable: rushing through connections, ignoring temperature checks, panicking when the display shows a weird reading instead of a clean number. Today, I’m walking you through exactly how to operate one of these devices, step by step, no jargon, no confusing industry buzzwords—just what works, from a guy who’s held your hand through his fair share of first-time tests. Transformer Winding Resistance Tester
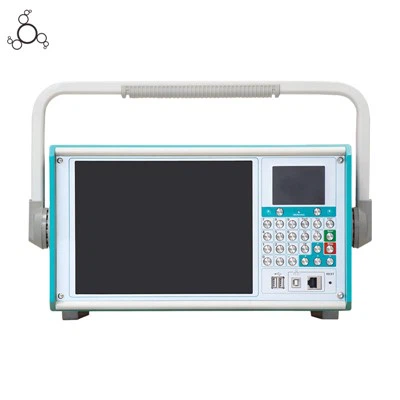
First, let’s get one thing straight: a transformer winding resistance tester isn’t some fancy, untamable lab machine. It’s a tool that measures the resistance of each winding in a transformer (the copper coils inside that step voltage up or down) in micro-ohms or ohms. This data is critical—too much resistance means bad connections, corroded coils, or even a winding short, and catching that early saves utilities, factories, and power companies from catastrophic, costly outages. For beginners, the biggest hurdle is not the tester itself, but the transformer it’s connected to. So let’s start with prep work, because skipping this part is how you end up with garbage data that makes you call a senior tech at 8 p.m. on a Friday.
Before you even pull the tester out of its hard case, do two non-negotiable checks. First, confirm the transformer is de-energized. I don’t care if the line switch has a big red off button and a sign that says “DO NOT OPERATE”—use a phase detector. I’ve seen a rookie tech skip this, connect to a live transformer, and fry his tester’s leads and nearly give himself a shock. It’s not worth the risk. Second, check the ambient temperature and the transformer’s surface temperature. Winding resistance changes with heat—for every 10°C rise, resistance goes up about 4%. Most good testers (the ones we sell, anyway) have a temperature compensation feature, but it only works if you input the correct ambient temp. You don’t need a fancy thermometer; a basic infrared temp gun works, or even a stick-on temperature strip will do. Jot that number down—you’ll need it later.
Next, gather your supplies and do a pre-test check on the tester itself. Open the hard case (our testers come with a foam insert to keep the unit, leads, test probes, and calibration card safe—don’t skip storing it this way, it’s how we keep repairs low). First, inspect the leads: look for frayed insulation, bent pins, or loose connections. A frayed lead can add extra resistance to your test, throwing off your numbers. If you spot damage, swap it out immediately—we sell replacement leads for exactly this reason, so don’t try to tape a frayed spot and call it good. Then, turn on the tester. It should boot up to a welcome screen, then show a “self-test” menu. Tap “run self-test” and wait 30 seconds. If it passes, you’re good. If it fails, don’t panic—most of the time it’s a dead battery (our testers have a 10-hour battery life, but if it’s been sitting in the case for months, it might need a quick charge). Plug it into a wall charger for 10 minutes, then try again. If it still fails, give our support team a shout before you try to fix it yourself—we’ve all been there, no shame.
Now, the part everyone gets nervous about: connecting the leads to the transformer windings. First, you need to know what kind of transformer you’re working with. Most distribution transformers (the ones on utility poles) are three-phase, with a high-voltage (HV) side and a low-voltage (LV) side. Some smaller, single-phase transformers (like the ones powering your local grocery store’s refrigeration) only have two windings. The key here is to connect the leads to the correct bushings—those big metal terminals on the outside of the transformer. Each phase has two bushings (line and load, but for testing, they’re paired per winding). For a three-phase transformer, that’s HV1, HV2, HV3 and LV1, LV2, LV3.
Here’s the rule for connecting leads: red for positive, black for negative, and match the phase number. So HV1 gets red, HV2 gets red, HV3 gets red, and LV1, LV2, LV3 get black. Wait—no, actually, let me correct that: it doesn’t matter which is positive or negative, because most modern testers reverse current automatically to eliminate residual magnetism in the winding. But it does matter that you don’t cross phases. I once watched a rookie connect HV1 to LV2, and spent an hour wondering why his readings were all over the place. Take a minute to label your bushings first—use a piece of masking tape and a marker, write HV1 on one bushing, HV2 on another, etc., so you don’t mix them up. Once you’ve matched each phase, make sure the leads are seated firmly. A loose connection will give you a “test failed” or a reading that’s way higher than it should be. Gently tug each lead to confirm it’s tight.
Now, we’re at the actual test step. This is where most beginners hit pause, waiting for some big, dramatic process, but it’s pretty straightforward. First, on the tester’s home screen, select “winding resistance test” (it’s the big, prominent button—we designed it that way for new users, no digging through menus). Next, you’ll see two options: auto-test and manual test. For beginners, auto-test is your best friend. It will automatically select the correct current based on the winding’s voltage (no need to calculate micro-amps vs. amps—we built that into the software for you). Tap auto-test, then input the ambient temperature you jotted down earlier. Double-check that you input the right temp—if you write 20°C instead of 30°C, your compensation will be off, and your readings won’t match the transformer’s nameplate.
Then, press start. Now, wait. This is the part that makes new techs antsy. Depending on the winding size, the test can take 30 seconds to 5 minutes. Larger transformers (like the ones at power stations) have bigger windings, so they take longer. The tester will show a progress bar, and if you’re looking at the display, you’ll see the resistance number climbing, then stabilizing. When it hits a steady line (no more big jumps), the test is done. For single-phase transformers, you test one winding at a time. For three-phase, the tester will cycle through each phase automatically, so you don’t have to reconnect leads.
Once the test is done, you’ll have a set of readings. Now what? You need to interpret them, which is way simpler than it sounds. First, compare the readings to the transformer’s nameplate resistance. The nameplate has a specified resistance per winding, usually at 20°C. Our testers automatically compensate your ambient temp to 20°C, so you don’t have to do the math. If your reading is within 1% of the nameplate, that’s perfect. If it’s 2-3% off, it’s probably a minor connection issue. If it’s more than 5% off, you need to check the bushing connections for corrosion or looseness. Also, for three-phase transformers, all three phase readings should be within 0.5% of each other. If one is way higher than the other two, that’s a red flag—could be a bad winding or a faulty bushing.
Wait a second—what about residual magnetism? That’s a thing, right? I get asked this all the time. Residual magnetism in the winding can cause a weird initial reading, but our testers have a built-in demagnetization feature that runs at the end of the test, so you don’t have to do it manually. That’s one of the upgrades we put in our testers specifically for beginners—no more struggling with external demagnetization tools or remembering to toggle that setting on.
Now, the post-test steps, which are just as important as the test itself. First, turn off the tester. Then, gently disconnect the leads from the transformer bushings, in the opposite order you connected them—black leads first, then red leads. If you disconnect red first, you might get a small spark from the residual current in the winding, which is harmless, but it’s good practice to prevent lead damage. Then, clean the leads and bushings with a dry cloth—if there’s dirt or corrosion on them, it can interfere with future tests. Store the tester back in its hard case, make sure the battery is charged if you’re going to use it again soon, and write down all your readings in a maintenance log. Trust me, you’ll need that log for next year’s test, or if a problem comes up later.
I know this all sounds like a lot, but let’s be real: once you’ve done three tests, it becomes second nature. I still remember my first test— I mixed up the phases, got a reading that was 10 times higher than it should be, and thought I’d broken the transformer. But it was just a lead mix-up, a mistake that every single person who works with these testers has made at least once.
Before I wrap this up, a few common beginner mistakes to avoid:
- Never test a wet transformer. Water can seep into the windings and cause a short, plus it can mess up your readings. Wait for it to dry completely before testing.
- Don’t rush the test. I see techs hit start and run over to get coffee, then come back and disconnect leads as soon as the progress bar hits 90%. You need to wait for the number to stabilize. Otherwise, you’ll get a wrong reading and have to redo the test.
- If you’re testing a transformer that’s been de-energized for less than 24 hours, let it sit for at least 8 hours before testing. Winding resistance takes time to stabilize after being energized.
- Don’t try to test a transformer that’s damaged. If you see dented bushings or oil leaks, call a professional before you even think about connecting your tester.

At the end of the day, operating a transformer winding resistance tester is all about being careful, following the steps, and not being afraid to make a mistake. Every pro started as a beginner, and if you’re working with a reliable tester like the ones we provide, you don’t have to be a genius to get accurate results. If you’re in the market for a tester, or you have questions about calibrating, leads, or troubleshooting a weird reading, our team is here to help. We’ve worked with everyone from part-time maintenance techs at small factories to senior engineers at major power utilities, so we know exactly what beginners need. Reach out to our procurement team when you’re ready to learn more—we’d be happy to walk you through choosing the right tester for your needs, answer any questions, and even connect you with a field tech in your area who can do a hands-on demo if you’re nervous about your first test.
HV Insulation Oil Tester and Oil Moisture Meter It’s worth noting that regular winding resistance tests are one of the cheapest, most effective ways to prevent transformer failure. A good tester pays for itself in the first year by catching a problem before it leads to an outage that costs tens of thousands of dollars in repairs and lost revenue. Don’t cut corners on this tool—invest in something reliable, and take the time to learn how to use it correctly. You’ll thank yourself later.
References
- Transformer Maintenance: Principles and Practices, IEEE Power Engineering Society, 2019.
- Operation and Calibration of Winding Resistance Testers, International Council on Large Electric Systems (CIGRE), Technical Brochure 782, 2019.
- Field Guide to Transformer Testing, Electric Power Research Institute (EPRI), 2021.
Wuhan Jiuhua Jingce Power Equipment Co., Ltd.
As one of the most experienced transformer winding resistance tester manufacturers in China, we offer a wide range of products with superior quality. Please feel free to wholesale bulk durable transformer winding resistance tester from our factory. For price consultation, contact us.
Address: 601,Unit 1,Building D4-02,Optics Valley Center,303 OpticsValley Avenue,Wuhan
E-mail: market@wuhanjhjc.com
WebSite: https://www.powertransformertester.com/
